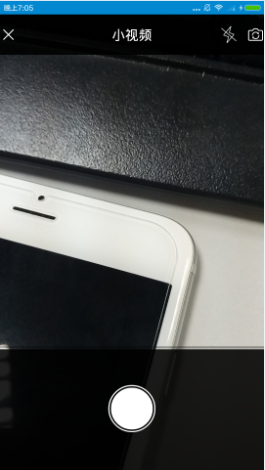
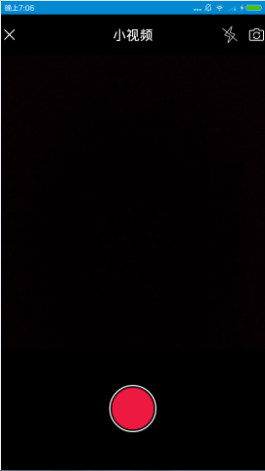
Dino's blog

Life is made up of small pleasures


  • 首页

  • 关于

  • 归档

  • 标签

  • 搜索
close

为过滤动态加入单选按钮

发表于 2016-08-16   |     |   阅读次数

项目上做的一个过滤筛选的,先看看效果图
1

这里的数据都是动态写入的,弹出的的是popupwindow,原本是侧滑的抽屉布局,领导要改成这样子,只好改了。

1.Android Radiogroup的坑

Android原生的Radiogroup是不支持换行的,也就是要么一直竖着要么一直横着,如果用两组radiogroup还需要自己实现互斥算法,比较麻烦。
我这里使用自定义radiogroup,继承系统的RadioGroup来实现,也可以继承LinearLayout,不过显然第一种比较简单。

1
2
3
4
5
6
7
8
9
10
11
12
13
14
15
16
17
18
19
20
21
22
23
24
25
26
27
28
29
30
31
32
33
34
35
36
37
38
39
40
41
42
43
44
45
46
47
48
49
50
51
52
53
54
55
56
57
58
59
60
61
62
63
64
65
66
67
68
69
70
71
72
73
74
75
76
77
78
79
80
81
82
83
84
85
86
87
88
89
90
91
92
93
94
95
96
97
98
99
100
101
102
103
104
105
106
107
108
109
110
111
112
113
114
115
116
117
118
119
120
121
122
123
124
125
import android.content.Context;
import android.util.AttributeSet;
import android.util.Log;
import android.view.View;
import android.widget.RadioGroup;
/**
* 重新对RadioGroup进行布局,可以折行
* 默认水平开始排布
*/
public class RadioGroupEx extends RadioGroup {
private static final String TAG = "RadioGroupEx";
public RadioGroupEx(Context context) {
super(context);
}
public RadioGroupEx(Context context, AttributeSet attrs) {
super(context, attrs);
}
@Override
protected void onMeasure(int widthMeasureSpec, int heightMeasureSpec) {
int widthSize = MeasureSpec.getSize(widthMeasureSpec);
int widthMode = MeasureSpec.getMode(widthMeasureSpec);
int heightSize = MeasureSpec.getSize(heightMeasureSpec);
int heightMode = MeasureSpec.getMode(heightMeasureSpec);
//调用ViewGroup的方法,测量子view
measureChildren(widthMeasureSpec, heightMeasureSpec);
//最大的宽
int maxWidth = 0;
//累计的高
int totalHeight = 0;
//当前这一行的累计行宽
int lineWidth = 0;
//当前这行的最大行高
int maxLineHeight = 0;
//用于记录换行前的行宽和行高
int oldHeight;
int oldWidth;
int count = getChildCount();
//假设 widthMode和heightMode都是AT_MOST
for (int i = 0; i < count; i++) {
View child = getChildAt(i);
MarginLayoutParams params = (MarginLayoutParams) child.getLayoutParams();
//得到这一行的最高
oldHeight = maxLineHeight;
//当前最大宽度
oldWidth = maxWidth;
int deltaX = child.getMeasuredWidth() + params.leftMargin + params.rightMargin;
if (lineWidth + deltaX + getPaddingLeft() + getPaddingRight() > widthSize) {//如果折行,height增加
//和目前最大的宽度比较,得到最宽。不能加上当前的child的宽,所以用的是oldWidth
maxWidth = Math.max(lineWidth, oldWidth);
//重置宽度
lineWidth = deltaX;
//累加高度
totalHeight += oldHeight;
//重置行高,当前这个View,属于下一行,因此当前最大行高为这个child的高度加上margin
maxLineHeight = child.getMeasuredHeight() + params.topMargin + params.bottomMargin;
Log.v(TAG, "maxHeight:" + totalHeight + "---" + "maxWidth:" + maxWidth);
} else {
//不换行,累加宽度
lineWidth += deltaX;
//不换行,计算行最高
int deltaY = child.getMeasuredHeight() + params.topMargin + params.bottomMargin;
maxLineHeight = Math.max(maxLineHeight, deltaY);
}
if (i == count - 1) {
//前面没有加上下一行的搞,如果是最后一行,还要再叠加上最后一行的最高的值
totalHeight += maxLineHeight;
//计算最后一行和前面的最宽的一行比较
maxWidth = Math.max(lineWidth, oldWidth);
}
}
//加上当前容器的padding值
maxWidth += getPaddingLeft() + getPaddingRight();
totalHeight += getPaddingTop() + getPaddingBottom();
setMeasuredDimension(widthMode == MeasureSpec.EXACTLY ? widthSize : maxWidth,
heightMode == MeasureSpec.EXACTLY ? heightSize : totalHeight);
}
@Override
protected void onLayout(boolean changed, int l, int t, int r, int b) {
int count = getChildCount();
//pre为前面所有的child的相加后的位置
int preLeft = getPaddingLeft();
int preTop = getPaddingTop();
//记录每一行的最高值
int maxHeight = 0;
for (int i = 0; i < count; i++) {
View child = getChildAt(i);
MarginLayoutParams params = (MarginLayoutParams) child.getLayoutParams();
//r-l为当前容器的宽度。如果子view的累积宽度大于容器宽度,就换行。
if (preLeft + params.leftMargin + child.getMeasuredWidth() + params.rightMargin + getPaddingRight() > (r - l)) {
//重置
preLeft = getPaddingLeft();
//要选择child的height最大的作为设置
preTop = preTop + maxHeight;
maxHeight = getChildAt(i).getMeasuredHeight() + params.topMargin + params.bottomMargin;
} else { //不换行,计算最大高度
maxHeight = Math.max(maxHeight, child.getMeasuredHeight() + params.topMargin + params.bottomMargin);
}
//left坐标
int left = preLeft + params.leftMargin;
//top坐标
int top = preTop + params.topMargin;
int right = left + child.getMeasuredWidth();
int bottom = top + child.getMeasuredHeight();
//为子view布局
child.layout(left, top, right, bottom);
//计算布局结束后,preLeft的值
preLeft += params.leftMargin + child.getMeasuredWidth() + params.rightMargin;
}
} }

在布局中用这个radiogroup替代原生的既可,使用方法不变

2.在activity中加入popup以及动态添加radiobutton的代码

1
2
3
4
5
6
7
8
9
10
11
12
13
14
15
16
17
18
19
20
21
22
23
24
25
26
27
28
29
30
31
32
33
34
35
36
37
38
39
40
41
42
43
44
45
46
47
48
49
50
51
52
53
54
55
56
57
58
59
60
61
62
63
64
65
66
67
68
69
70
71
72
73
74
75
76
77
78
79
80
81
82
83
84
85
86
87
88
89
90
91
92
93
94
95
96
97
98
99
100
101
102
103
104
105
106
107
108
109
110
111
112
113
114
115
116
117
118
119
120
121
122
123
124
125
126
127
128
129
130
131
132
133
134
135
136
137
138
139
140
141
142
143
144
145
146
147
148
149
150
151
152
153
154
155
156
157
158
159
160
161
162
163
164
165
166
167
168
169
170
171
172
173
174
175
176
177
178
179
180
181
182
183
184
185
186
187
188
189
190
191
192
193
194
195
196
197
198
199
200
201
202
203
204
205
206
207
208
209
210
211
212
213
214
215
216
217
218
219
220
221
222
223
224
225
/**
* 过滤的popup
*/
private final static String primaryUrl = "www/js/primary_class_phase.json";//小学
private final static String juniorUrl = "www/js/junior_class_phase.json";//初中
private final static String seniorUrl = "www/js/senior_class_phase.json";//高中
private RadioGroupEx phaseRadio;//学段
private RadioGroupEx gradeRadio;//年级
private RadioGroupEx subjectRadio;//科目
private String[] phaseCode={"2","3","4"};
private String[] gradeCode={"1","2","3","5","7","9"};
private List<String> subjectCode=new ArrayList<>();
private void showPopupWindowFilter(View view) {
// 一个自定义的布局,作为显示的内容
View contentView = LayoutInflater.from(this).inflate(R.layout.openclass_filter_popup, null);
phaseRadio = (RadioGroupEx) contentView.findViewById(R.id.openclass_radio_phase);
gradeRadio = (RadioGroupEx) contentView.findViewById(R.id.openclass_radio_grade);
subjectRadio = (RadioGroupEx) contentView.findViewById(R.id.openclass_radio_subject);
phaseRadio.setOrientation(LinearLayout.HORIZONTAL);
gradeRadio.setOrientation(LinearLayout.HORIZONTAL);
subjectRadio.setOrientation(LinearLayout.HORIZONTAL);
RadioGroup.OnCheckedChangeListener popupRadioCheckListener = new RadioGroup.OnCheckedChangeListener() {
@Override
public void onCheckedChanged(RadioGroup group, int checkedId) {
switch (group.getId()){
case R.id.openclass_radio_phase://学段
phaseId = (String)group.findViewById(checkedId).getTag();
mGradeId = "";
subjectId = "";
int pid = Integer.parseInt(phaseId);
createSubjectRadio(pid,subjectRadio);
createGradeRadio(pid,gradeRadio);
break;
case R.id.openclass_radio_grade://年级
mGradeId = (String)group.findViewById(checkedId).getTag();
break;
case R.id.openclass_radio_subject://科目
subjectId = (String)group.findViewById(checkedId).getTag();
break;
}
Log.d(TAG,"phaseId:"+phaseId+"mGradeId:"+mGradeId+"subjectId:"+subjectId);
if(!StringUtils.isEmpty(phaseId)&&!StringUtils.isEmpty(mGradeId)&&!StringUtils.isEmpty(subjectId)){
int currentItem = mViewPager.getCurrentItem();
Fragment fragment = adapter.getPage(currentItem);
if (fragment instanceof OpenclassUpdateFilter) {
OpenclassUpdateFilter openclassUpdateFilter = (OpenclassUpdateFilter)fragment ;
openclassUpdateFilter.updateData(phaseId,mGradeId,subjectId);
}
}
}
};
phaseRadio.setOnCheckedChangeListener(popupRadioCheckListener);
gradeRadio.setOnCheckedChangeListener(popupRadioCheckListener);
subjectRadio.setOnCheckedChangeListener(popupRadioCheckListener);
createPhaseRadio(phaseRadio);
createGradeRadio(2,gradeRadio);//创建年级单选,根据学段,默认小学
createSubjectRadio(2,subjectRadio);//创建科目单选,根据学段,默认小学
WindowManager wm = (WindowManager) getSystemService(WINDOW_SERVICE);
int width = (int) ((wm.getDefaultDisplay().getWidth()) * 0.35);//获取屏幕宽度的0.35倍赋给该popupWindow
final PopupWindow popupWindow = new PopupWindow(contentView,
LinearLayout.LayoutParams.MATCH_PARENT, LinearLayout.LayoutParams.WRAP_CONTENT, true);
popupWindow.setAnimationStyle(R.style.popwin_anim_style);
popupWindow.setTouchable(true);
popupWindow.setTouchInterceptor(new View.OnTouchListener() {
@Override
public boolean onTouch(View v, MotionEvent event) {
Log.i("mengdd", "onTouch : ");
return false;
// 这里如果返回true的话,touch事件将被拦截
// 拦截后 PopupWindow的onTouchEvent不被调用,这样点击外部区域无法dismiss
}
});
// 如果不设置PopupWindow的背景,无论是点击外部区域还是Back键都无法dismiss弹框
// 我觉得这里是API的一个bug
popupWindow.setBackgroundDrawable(new ColorDrawable(getResources().getColor(R.color.transparent)));
// 设置好参数之后再show
popupWindow.showAsDropDown(view);
// popupWindow.showAtLocation(view, Gravity.RIGHT | Gravity.TOP, ScreenUtil.dip2px(this, 8), ScreenUtil.dip2px(this, 70));
}
private void createPhaseRadio(RadioGroup radioGroup){
RadioButton tempButton1 = getBaseRadioButton();
tempButton1.setText("小学");
tempButton1.setTag(phaseCode[0]);
radioGroup.addView(tempButton1, getbaseLayoutParams());
RadioButton tempButton2 = getBaseRadioButton();
tempButton2.setText("初中");
tempButton2.setTag(phaseCode[1]);
radioGroup.addView(tempButton2, getbaseLayoutParams());
RadioButton tempButton3 = getBaseRadioButton();
tempButton3.setText("高中");
tempButton3.setTag(phaseCode[2]);
radioGroup.addView(tempButton3, getbaseLayoutParams());
tempButton1.setChecked(true);//默认小学
phaseId = "2";
}
private void createGradeRadio(int phase,RadioGroup radioGroup){
radioGroup.removeAllViews();
switch (phase){
case 2:
RadioButton tempButton1 = getBaseRadioButton();
tempButton1.setText("一年级");
tempButton1.setTag(gradeCode[0]);
radioGroup.addView(tempButton1, getbaseLayoutParams());
RadioButton tempButton2 = getBaseRadioButton();
tempButton2.setText("二年级");
tempButton2.setTag(gradeCode[1]);
radioGroup.addView(tempButton2, getbaseLayoutParams());
RadioButton tempButton3 = getBaseRadioButton();
tempButton3.setText("三年级");
tempButton3.setTag(gradeCode[2]);
radioGroup.addView(tempButton3, getbaseLayoutParams());
RadioButton tempButton4 = getBaseRadioButton();
tempButton4.setText("四年级");
tempButton4.setTag(gradeCode[3]);
radioGroup.addView(tempButton4, getbaseLayoutParams());
RadioButton tempButton5 = getBaseRadioButton();
tempButton5.setText("五年级");
tempButton5.setTag(gradeCode[4]);
radioGroup.addView(tempButton5, getbaseLayoutParams());
RadioButton tempButton6 = getBaseRadioButton();
tempButton6.setText("六年级");
tempButton6.setTag(gradeCode[5]);
radioGroup.addView(tempButton6, getbaseLayoutParams());
break;
case 3:
case 4:
RadioButton tempButton7 = getBaseRadioButton();
tempButton7.setText("一年级");
tempButton7.setTag(gradeCode[0]);
radioGroup.addView(tempButton7, getbaseLayoutParams());
RadioButton tempButton8 = getBaseRadioButton();
tempButton8.setText("二年级");
tempButton8.setTag(gradeCode[1]);
radioGroup.addView(tempButton8, getbaseLayoutParams());
RadioButton tempButton9 = getBaseRadioButton();
tempButton9.setText("三年级");
tempButton9.setTag(gradeCode[2]);
radioGroup.addView(tempButton9, getbaseLayoutParams());
break;
}
}
private void createSubjectRadio(final int phase, final RadioGroup radioGroup){
dialogHelper.showProgressDialog("加载中...");
new Thread(new Runnable() {
@Override
public void run() {
String jsonStr="";
switch (phase){
case 2:
jsonStr = AppJsonFileReader.getJson(OpenClassActivity.this,primaryUrl);//小学
break;
case 3:
jsonStr = AppJsonFileReader.getJson(OpenClassActivity.this,juniorUrl);//初中
break;
case 4:
jsonStr = AppJsonFileReader.getJson(OpenClassActivity.this,seniorUrl);//高中
break;
}
final List<Map<String, String>> data = AppJsonFileReader.setListData(jsonStr);
// list.addAll(mCources);
runOnUiThread(new Runnable() {
@Override
public void run() {
radioGroup.removeAllViews();
subjectCode.clear();
radioGroup.setOrientation(LinearLayout.HORIZONTAL);
for(int i = 0;i<data.size();i++){
RadioButton tempButton = getBaseRadioButton();
tempButton.setText(data.get(i).get("Name"));
tempButton.setTag(data.get(i).get("Code"));
radioGroup.addView(tempButton, getbaseLayoutParams());
subjectCode.add(data.get(i).get("Code"));
}
dialogHelper.dismissProgressDialog();
}
});
}
}).start();
}
private RadioButton getBaseRadioButton(){
RadioButton tempButton = new RadioButton(this);
// tempButton.setTextSize(ScreenUtil.dip2px(context, 5));
tempButton.setTextSize(TypedValue.COMPLEX_UNIT_SP,16);
tempButton.setTextColor(getResources().getColorStateList(R.color.filter_phase_text_selecter));
tempButton.setButtonDrawable(getResources().getDrawable(android.R.color.transparent));
// tempButton.setCompoundDrawablesWithIntrinsicBounds(null, null, null, null);
tempButton.setBackgroundResource(R.drawable.filter_phase_selecter);
// tempButton.setCompoundDrawablePadding(ScreenUtil.dip2px(getActivity(), 10));
// tempButton.setPadding(20, 20, 20, 20); // 设置文字距离按钮四周的距离
// layoutParams.weight =0.3f;
// tempButton.setLayoutParams(layoutParams);
return tempButton;
}
private RadioGroup.LayoutParams getbaseLayoutParams(){
RadioGroup.LayoutParams layoutParams = new RadioGroup.LayoutParams(RadioGroup.LayoutParams.WRAP_CONTENT, RadioGroup.LayoutParams.WRAP_CONTENT);
layoutParams.setMargins(15,15,15,15);
return layoutParams;
}

动态创建radiobutton的地方纠结了好久,主要是设置margin不生效的问题,这里要注意要用RadioGroup.LayoutParams,在stackoverflow上找到的解决办法。

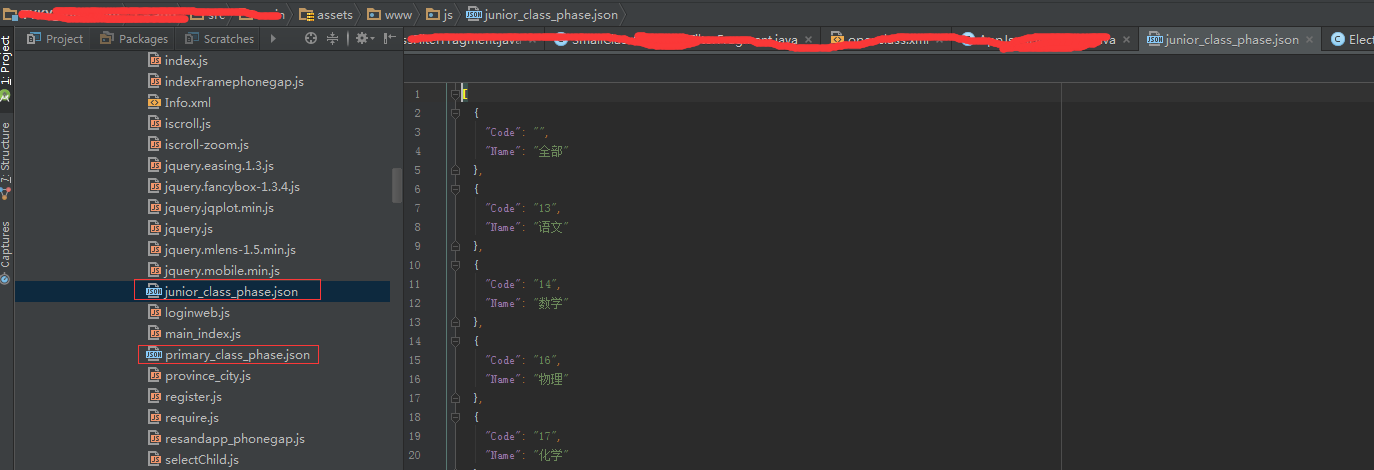
服务端的过滤数据写的是配置,不会变的的学段和年级就直接写死了,科目写的json配置文件,动态读取。

popup的xml

1
2
3
4
5
6
7
8
9
10
11
12
13
14
15
16
17
18
19
20
21
22
23
24
25
26
27
28
29
30
31
32
33
34
35
36
37
38
39
40
41
42
43
44
45
46
47
48
49
50
51
52
53
54
55
56
57
58
59
60
61
62
63
64
65
66
67
68
69
70
71
72
73
74
75
76
77
78
79
80
81
82
83
84
85
86
87
88
89
90
91
92
93
94
95
96
97
98
99
100
101
102
103
<?xml version="1.0" encoding="utf-8"?>
<LinearLayout xmlns:android="http://schemas.android.com/apk/res/android"
xmlns:student="http://schemas.android.com/apk/res-auto"
android:id="@id/openclass_filter"
android:layout_width="match_parent"
android:layout_height="match_parent"
android:background="@color/white"
android:orientation="vertical">
<RelativeLayout
android:layout_width="wrap_content"
android:layout_height="wrap_content"
android:layout_gravity="center_vertical"
android:layout_marginBottom="15dp"
android:layout_marginLeft="15dp"
android:layout_marginTop="15dp">
<TextView
android:id="@id/openclass_condition_phase"
android:layout_width="wrap_content"
android:layout_height="wrap_content"
android:layout_marginRight="8dp"
android:layout_marginTop="8dp"
android:text="@string/openclass_screening_phase"
android:textSize="20sp" />
<com.tyky.edu.teacher.main.ui.RadioGroupEx
android:id="@+id/openclass_radio_phase"
android:layout_width="match_parent"
android:layout_height="wrap_content"
android:layout_toRightOf="@id/openclass_condition_phase"></com.tyky.edu.teacher.main.ui.RadioGroupEx>
</RelativeLayout>
<TextView
android:layout_width="match_parent"
android:layout_height="1dp"
android:layout_marginLeft="8dp"
android:layout_marginRight="8dp"
android:background="@color/filter_radio_line" />
<RelativeLayout
android:layout_width="wrap_content"
android:layout_height="wrap_content"
android:layout_marginBottom="15dp"
android:layout_marginLeft="15dp"
android:layout_marginTop="15dp">
<TextView
android:id="@id/openclass_condition_grade"
android:layout_width="wrap_content"
android:layout_height="wrap_content"
android:layout_marginRight="8dp"
android:layout_marginTop="8dp"
android:text="@string/openclass_screening_grade"
android:textSize="20sp" />
<com.tyky.edu.teacher.main.ui.RadioGroupEx
android:id="@+id/openclass_radio_grade"
android:layout_width="match_parent"
android:layout_height="wrap_content"
android:layout_toRightOf="@id/openclass_condition_grade"></com.tyky.edu.teacher.main.ui.RadioGroupEx>
</RelativeLayout>
<TextView
android:layout_width="match_parent"
android:layout_height="1dp"
android:layout_marginLeft="8dp"
android:layout_marginRight="8dp"
android:background="@color/filter_radio_line" />
<RelativeLayout
android:layout_width="wrap_content"
android:layout_height="wrap_content"
android:layout_marginBottom="15dp"
android:layout_marginLeft="15dp"
android:layout_marginTop="15dp">
<TextView
android:id="@id/openclass_condition_subject"
android:layout_width="wrap_content"
android:layout_height="wrap_content"
android:layout_marginRight="8dp"
android:layout_marginTop="8dp"
android:text="@string/openclass_screening_subject"
android:textSize="20sp" />
<ScrollView
android:layout_width="match_parent"
android:layout_height="wrap_content"
android:layout_toRightOf="@id/openclass_condition_subject"
android:fillViewport="true">
<com.tyky.edu.teacher.main.ui.RadioGroupEx
android:id="@+id/openclass_radio_subject"
android:layout_width="match_parent"
android:layout_height="wrap_content"
></com.tyky.edu.teacher.main.ui.RadioGroupEx>
</ScrollView>
</RelativeLayout>
</LinearLayout>

3.直接在点击事件出调用showPopupWindowFilter既可

这里popup弹出用到了一个折叠动画

下面附上代码,以后有时间再详细写写各种动画

style:

1
2
3
4
<style name="popwin_anim_style">
<item name="android:windowEnterAnimation">@anim/popup_show_anim</item>
<item name="android:windowExitAnimation">@anim/popup_hide_anim</item>
</style>

popup_show_anim:

1
2
3
4
5
6
7
8
9
10
11
<?xml version="1.0" encoding="utf-8"?>
<set xmlns:android="http://schemas.android.com/apk/res/android">
<scale
android:fromXScale="1.0"
android:toXScale="1.0"
android:fromYScale="0.0"
android:toYScale="1.0"
android:pivotX="100%"
android:pivotY="0"
android:duration="300" />
</set>

popup_hide_anim:

1
2
3
4
5
6
7
8
9
10
11
<?xml version="1.0" encoding="utf-8"?>
<set xmlns:android="http://schemas.android.com/apk/res/android">
<scale
android:fromXScale="1.0"
android:toXScale="1.0"
android:fromYScale="1.0"
android:toYScale="0.0"
android:pivotX="100%"
android:pivotY="0"
android:duration="300" />
</set>

使用drawable来实现圆形按钮以及点击效果

发表于 2016-08-15   |     |   阅读次数

今天要做一个视频录制的功能,录制的按钮要和ios的一致,觉得用drawable实现更简单,下面先看看效果
btn_normal
btn_click

1.新建一个record_normal_shape.xml

1
2
3
4
5
6
7
8
9
10
11
12
13
14
15
16
17
18
19
20
21
22
23
24
25
26
27
28
29
30
31
32
33
34
35
<?xml version="1.0" encoding="utf-8"?>
<layer-list xmlns:android="http://schemas.android.com/apk/res/android" >
<item>
<shape android:shape="oval" >
<solid
android:color="@color/white"/>
<size android:width="20dp"
android:height="20dp"/>
</shape>
</item>
<item android:bottom="2dp"
android:top="2dp"
android:left="2dp"
android:right="2dp">
<shape android:shape="oval" >
<solid
android:color="@color/black"/>
<size android:width="20dp"
android:height="20dp"/>
</shape>
</item>
<item android:bottom="4dp"
android:top="4dp"
android:left="4dp"
android:right="4dp">
<shape android:shape="oval" >
<solid
android:color="@color/white"/>
<size android:width="20dp"
android:height="20dp"/>
</shape>
</item>
</layer-list>

2.新建record_click_shape.xml

代码基本和上面一样,只是颜色由白色变为红色

1
2
3
4
5
6
7
8
9
10
11
12
13
14
15
16
17
18
19
20
21
22
23
24
25
26
27
28
29
30
31
32
33
34
35
<?xml version="1.0" encoding="utf-8"?>
<layer-list xmlns:android="http://schemas.android.com/apk/res/android" >
<item>
<shape android:shape="oval" >
<solid
android:color="@color/white"/>
<size android:width="20dp"
android:height="20dp"/>
</shape>
</item>
<item android:bottom="2dp"
android:top="2dp"
android:left="2dp"
android:right="2dp">
<shape android:shape="oval" >
<solid
android:color="@color/black"/>
<size android:width="20dp"
android:height="20dp"/>
</shape>
</item>
<item android:bottom="4dp"
android:top="4dp"
android:left="4dp"
android:right="4dp">
<shape android:shape="oval" >
<solid
android:color="@color/red"/>
<size android:width="20dp"
android:height="20dp"/>
</shape>
</item>
</layer-list>

3.新建record_statue_selector.xml

1
2
3
4
5
6
7
8
9
<?xml version="1.0" encoding="utf-8"?>
<selector xmlns:android="http://schemas.android.com/apk/res/android">
<item android:drawable="@drawable/record_click_shape" android:state_focused="true"/>
<item android:drawable="@drawable/record_click_shape" android:state_pressed="true"/>
<item android:drawable="@drawable/record_click_shape" android:state_selected="true"/>
<item android:drawable="@drawable/record_normal_shape"/>
</selector>

4.直接在布局文件中添加background既可

1
2
3
4
5
6
<ImageButton
android:id="@id/btn_recorder_record"
android:layout_width="70dp"
android:layout_height="70dp"
android:layout_centerInParent="true"
android:background="@drawable/record_statue_selecter" />

实现起来很简单,这种方式不但可以画出圆形,还可以画矩形,直线,环形,椭圆。以及设置圆角,边线等等。

Android读取json配置

发表于 2016-08-09   |     |   阅读次数

工作的新需求,需要加过滤,但是过滤的字段没有服务,只能像服务端一样写本地配置化。。。orz
把配置写成json格式放在assets下面。

1.构造json放在assets下面,如图

filter

2.写一个util 代码如下

1
2
3
4
5
6
7
8
9
10
11
12
13
14
15
16
17
18
19
20
21
22
23
24
25
26
27
28
29
30
31
32
33
34
35
36
37
38
39
40
41
42
43
44
45
46
47
48
49
50
51
52
53
54
55
56
57
58
59
import android.content.Context;
import android.content.res.AssetManager;
import org.json.JSONArray;
import org.json.JSONException;
import org.json.JSONObject;
import java.io.BufferedReader;
import java.io.IOException;
import java.io.InputStreamReader;
import java.util.ArrayList;
import java.util.HashMap;
import java.util.List;
import java.util.Map;
/**
* Created by Dino on 8/9 0009.
*/
public class AppJsonFileReader {
public static String getJson(Context context, String fileName) {
StringBuilder stringBuilder = new StringBuilder();
try {
AssetManager assetManager = context.getAssets();
BufferedReader bf = new BufferedReader(new InputStreamReader(
assetManager.open(fileName)));
String line;
while ((line = bf.readLine()) != null) {
stringBuilder.append(line);
}
} catch (IOException e) {
e.printStackTrace();
}
return stringBuilder.toString();
}
public static List<Map<String, String>> setListData(String str) {
List<Map<String, String>> data = new ArrayList<Map<String, String>>();
try {
JSONArray array = new JSONArray(str);
int len = array.length();
Map<String, String> map;
for (int i = 0; i < len; i++) {
JSONObject object = array.getJSONObject(i);
map = new HashMap<String, String>();
map.put("Code", object.getString("Code"));
map.put("Name", object.getString("Name"));
data.add(map);
}
} catch (JSONException e) {
e.printStackTrace();
}
return data;
}
}

3.在activity里面调用代码:

1
2
3
4
5
6
7
8
9
10
11
12
13
14
15
16
17
18
19
20
21
22
23
24
25
26
27
28
29
30
31
32
33
34
private final static String primary = "www/js/primary_class_phase.json";
private final static String junior = "www/js/junior_class_phase.json";
private final static String senior = "www/js/senior_class_phase.json";
new Thread(new Runnable() {
@Override
public void run() {
String jsonStr="";
if("2".equals(phase)){//小学
jsonStr = AppJsonFileReader.getJson(getActivity(),primary);
}else if("3".equals(phase)){//初中
jsonStr = AppJsonFileReader.getJson(getActivity(),junior);
}else if("4".equals(phase)){//高中
jsonStr = AppJsonFileReader.getJson(getActivity(),senior);
}
List<Map<String, String>> data = AppJsonFileReader.setListData(jsonStr);
for(int i = 0;i<data.size();i++){
mCources.add(data.get(i).get("Name"));
mCourcesId.add(data.get(i).get("Code"));
}
list.clear();
list.addAll(mCources);
getActivity().runOnUiThread(new Runnable() {
@Override
public void run() {
mAdapter = new ArrayAdapter<String>(getActivity(), android.R.layout.simple_list_item_1, list);
mListView.setAdapter(mAdapter);
}
});
}
}).start();

Android6.0权限机制变更

发表于 2016-08-09   |     |   阅读次数

Android6.0以前

所有权限都在安装应用时显示给用户,用户选择安装则表示接受这些权限,之后无法撤销授权。

Android6.0开始

在安装应用时,部分危险权限会展示给用户,默认不勾选,用户可选择授权,并可以在安装之后进入设置撤销授权。
Dangerous permissions:

  • CALENDAR
    • READ_CALENDAR
    • WRITE_CALENDAR
  • CAMERA
    • READ_CALENDAR
    • WRITE_CALENDAR
  • CONTACTS
    • READ_CONTACTS
    • WRITE_CONTACTS
    • GET_ACCOUNTS
  • LOCATION
    • ACCESS_FINE_LOCATION
    • ACCESS_COARSE_LOCATION
  • MICROPHONE
    • RECORD_AUDIO
  • PHONE
    • READ_PHONE_STATE
    • CALL_PHONE
    • READ_CALL_LOG
    • WRITE_CALL_LOG
    • ADD_VOICEMAIL
    • USE_SIP
    • PROCESS_OUTGOING_CALLS
  • SENSORS
    • BODY_SENSORS
  • SMS
    • SEND_SMS
    • RECEIVE_SMS
    • READ_SMS
    • RECEIVE_WAP_PUSH
    • RECEIVE_MMS
  • STORAGE
    • READ_EXTERNAL_STORAGE
    • WRITE_EXTERNAL_STORAGE

权限详细信息查看

想要查看所有dangerous的权限, 也可以用命令:
adb shell pm list permissions -g -d

Guides里面的原文:

  • If the device is running Android 6.0 (API level 23) or higher, and the app’s targetSdkVersion is 23 or higher, the app requests permissions from the user at run-time. The user can revoke the permissions at any time, so the app needs to check whether it has the permissions every time it runs. For more information about requesting permissions in your app, see the Working with System Permissions training guide.
  • If the device is running Android 5.1 (API level 22) or lower, or the app’s targetSdkVersion is 22 or lower, the system asks the user to grant the permissions when the user installs the app. If you add a new permission to an updated version of the app, the system asks the user to grant that permission when the user updates the app. Once the user installs the app, the only way they can revoke the permission is by uninstalling the app.

只有满足targetSdkVersion和实际使用设备的版本都在23及以上的时候,才会采用新的动态权限机制. 其他情况, 跟之前一样, 在安装和升级应用的时候就授权了所有的权限.
如果targetSdkVersion小于23,即被认为是Android 6.0发布之前开发的应用, 还没有兼容6.0.
这种应用即便是被装在Android 6.0的机器上,也是采用原来的安装即授予权限逻辑, 所有权限在应用安装时全部被授权.
在Android 6.0的设备上安装targetSdkVersion小于23的应用之后, 可以在应用的设置中查看,发现所有的dangerous权限状态都是打开.
但是用户仍然可以在系统设置中禁用权限

因为权限动态检查相关的API是Android 6.0才加入的, 所以minSdkVersion不是23时,推荐使用SupportLibrary来实现,好处是: 程序里不必加if来判断当前设备的版本.support的包必须是23以上才可以.

下面来讲讲代码中如何适配这种新的权限机制:

1.检查权限状态

如果在执行操作需要一个dangerous permission,那么每次执行操作都必须检查是否有这个权限,因为用户可以随意更改授权,所以必须每次都进行检查,比如我这里需要选择照片就需要加如下代码:

1
2
3
4
5
if(PackageManager.PERMISSION_GRANTED == ContextCompat.checkSelfPermission(getActivity(), Manifest.permission.READ_EXTERNAL_STORAGE)){
goImageSelect();
}else{
//do not have permission
}

2.动态请求权限

如果上面的判断没有权限,那么就需要显式的请求这个权限,Android提供了方法来动态请求权限,调用这些方法会弹出标准的dialog,目前这个dialog不能被定制。

2.1有时候可能需要解释为什么需要这个权限

一种方式是,当用户拒绝过这个权限,但是又用到了这个功能, 那么很可能用户不是很明白为什么app需要这个权限, 这时候就可以先向用户解释一下.
为了发现这种用户可能需要解释的情形, Android提供了一个工具类方法: shouldShowRequestPermissionRationale()
如果app之前请求过该权限,被用户拒绝, 这个方法就会返回true.
如果用户之前拒绝权限的时候勾选了对话框中”Don’t ask again”的选项,那么这个方法会返回false.
如果设备策略禁止应用拥有这条权限, 这个方法也返回false.
具体解释原因的这个dialog需要自己实现, 系统没有提供.

1
2
3
4
5
6
7
8
9
10
11
12
13
//do not have permission
// Should we show an explanation?
if (ActivityCompat.shouldShowRequestPermissionRationale(MainActivity.this,
Manifest.permission.READ_CONTACTS)) {
// Show an explanation to the user *asynchronously* -- don't block
// this thread waiting for the user's response! After the user
// sees the explanation, try again to request the permission.
Log.i(DEBUG_TAG, "we should explain why we need this permission!");
} else {
// No explanation needed, we can request the permission.
}

2.2请求权限

请求权限的方法分两种
一种是在Activity里面请求使用如下方法
requestPermissions(final @NonNull Activity activity,
final @NonNull String[] permissions, final int requestCode)
传入一个Activity, 一个permission名字的数组, 和一个整型的request code.
这个方法是异步的,它会立即返回, 当用户和dialog交互完成之后,系统会调用回调方法,传回用户的选择结果和对应的request code.
示例代码:

1
ActivityCompat.requestPermissions(CreateMeetActivity.this,new String[]{Manifest.permission.READ_EXTERNAL_STORAGE}, PermissionCode.MY_PERMISSIONS_REQUEST_READ_EXTERNAL_STORAGE);

一种是在Fragment里面请求
requestPermissions(@NonNull String[] permissions, int requestCode)
少一个Activity参数,其他一样,但是回调需要特别说明,还有fragment嵌套fragment的回调处理情况,下面会单独说明。

2.3处理请求权限的响应

当用户对请求权限的dialog做出响应之后,系统会调用onRequestPermissionsResult() 方法,传回用户的选择结果和request code.
这个回调中request code即为调用requestPermissions()时传入的参数,是app自定义的一个整型值.
如果请求取消,返回的数组将会为空.
代码如下:

1
2
3
4
5
6
7
8
9
10
11
12
13
14
15
16
17
18
19
20
21
22
23
24
25
@Override
public void onRequestPermissionsResult(int requestCode, @NonNull String[] permissions, @NonNull int[] grantResults) {
super.onRequestPermissionsResult(requestCode, permissions, grantResults);
switch (requestCode) {
case PermissionCode.MY_PERMISSIONS_REQUEST_READ_EXTERNAL_STORAGE: {
// If request is cancelled, the result arrays are empty.
if (grantResults.length > 0&& grantResults[0] == PackageManager.PERMISSION_GRANTED) {
// permission was granted, yay! Do the
// contacts-related task you need to do.
goFileSelect();
Log.i(TAG, "user granted the permission!");
} else {
// permission denied, boo! Disable the
// functionality that depends on this permission.
Log.i(TAG, "user denied the permission!");
}
return;
}
// other 'case' lines to check for other
// permissions this app might request
}

在Fragment中申请权限,不要使用ActivityCompat.requestPermissions, 直接使用Fragment的requestPermissions方法,否则会回调到Activity的 onRequestPermissionsResult
如果在Fragment中嵌套Fragment,在子Fragment中使用requestPermissions方 法,onRequestPermissionsResult不会回调回来,建议使用 getParentFragment().requestPermissions方法,这个方法会回调到父Fragment中的onRequestPermissionsResult,加入以下代码可以把回调透传到子Fragment

1
2
3
4
5
6
7
8
9
10
11
12
@Override
public void onRequestPermissionsResult(int requestCode, String[] permissions, int[] grantResults) {
super.onRequestPermissionsResult(requestCode, permissions, grantResults);
List<Fragment> fragments = getChildFragmentManager().getFragments();
if (fragments != null) {
for (Fragment fragment : fragments) {
if (fragment != null) {
fragment.onRequestPermissionsResult(requestCode,permissions,grantResults);
}
}
}
}

如何使用markdown插入图片

发表于 2016-08-08   |     |   阅读次数

由于对markdown语法不是很熟,上篇博客都没有插图,今天研究了下在上篇博客补了两张图。下面记录下,怎么插入图片:

1.首先确认_config.yml 中有 post_asset_folder:true

然后执行如下命令下载hexo图片插件
npm install https://github.com/CodeFalling/hexo-asset-image --save

2.在md所在的目录下面创建和md同名的文件夹,如:

2016-08-05
├── xxx.png
└── xxxx.png
2016-08-05.md

catalog

然后使用![xxx](2016-08-05/xxx.png)就可插入图片

注意如果是先下载的插件,当执行命令创建md的时候,会自动创建同名文件夹用来存放图片

生成的结构为
public/2016/08/05/2016-08-05
├── xxx.png
└── xxxx.png

生成的 html 是

<img src="/2016/08/05/2016-08-05/xxx.png" alt="xxx">

1234
Dino

Dino

Life is made up of small pleasures.

16 日志
5 标签
GitHub Facebook
© 2017 Dino